Last Updated on July 14, 2026
Are you ready to transform your plain terracotta pots into stunning pieces of art? Painting your pots can bring new life to your garden or indoor plants, making them stand out with vibrant colors and unique designs.
But how do you get that professional look without spending hours or buying expensive tools? You’ll discover simple, expert tips that make painting terracotta pots easy and fun. By the time you finish reading, you’ll have the confidence to create beautiful pots that everyone will admire.
Let’s dive in and turn your pots into eye-catching masterpieces!
Choosing The Right Terracotta Pots
Choosing the right terracotta pots sets the foundation for a successful painting project. The pot’s size, shape, and condition affect how the paint looks and lasts. Careful selection ensures the pot works well for your plants and your design ideas.
Selecting Sizes And Shapes
Start by deciding the size of the pot you need. Small pots suit herbs or succulents. Larger pots fit flowers or small shrubs. Think about the space where you will place the pot. Round pots are classic and easy to paint. Square or unusual shapes add a modern touch. Pick shapes that match your style and fit your plants.
Checking For Quality And Condition
Inspect the pot for cracks or chips. Damaged pots may not hold soil or water well. Smooth surfaces help paint stick better. Rough or porous pots need extra sealing before painting. Choose pots with a strong base to avoid tipping. Good quality terracotta lasts longer and looks better after painting.
Essential Supplies For Painting
Before painting terracotta pots, gather the right supplies. Proper materials make your work easier and results better. This section covers the must-have items to start your project.
Types Of Paints To Use
Acrylic paint works best for terracotta pots. It sticks well and dries fast. Outdoor or waterproof acrylic paint lasts longer outside. Avoid oil-based paints, as they may peel or crack. Spray paints can be used but need good ventilation.
Brushes And Tools Needed
Use synthetic brushes for smooth, even coverage. Small round brushes help with details. Flat brushes cover large areas quickly. A sponge brush can create texture effects. Have a palette or tray ready for mixing colors.
Preparing Your Workspace
Choose a clean, flat area with good light. Cover surfaces with newspaper or plastic to catch spills. Keep water and paper towels nearby for cleaning brushes. Work in a well-ventilated space to avoid fumes from paint or sealant.
Preparing Pots For Painting
Preparing terracotta pots for painting is a key step to get a smooth, long-lasting finish. The pots must be clean, dry, and ready to hold the paint well. This preparation helps the paint stick better and keeps the pots looking fresh for a long time.
Start by cleaning the pots carefully. Then, make the surface smooth with sanding. Finally, apply a primer to protect the pot and create a strong base for the paint.
Cleaning And Drying
First, remove dirt and dust from the pot’s surface. Use a brush or cloth to clean off loose soil. Wash the pot with water and mild soap. Rinse well to remove soap residue. Let the pot dry completely before painting. Drying can take a few hours or overnight. Paint sticks better to a dry pot.
Sanding For Smoothness
Next, use fine sandpaper to smooth the pot’s surface. Sand lightly to remove rough spots and old paint. This step helps the paint spread evenly. Wipe away dust with a damp cloth after sanding. Make sure the pot is dry before the next step.
Applying Primer
Apply a coat of primer to the pot. Primer helps paint stick and lasts longer. Use a brush or spray primer for even coverage. Let the primer dry fully before painting. This step seals the pot and prevents paint from soaking in.
Painting Techniques For A Professional Finish
Painting terracotta pots can turn simple garden items into beautiful art pieces. Using the right painting techniques helps achieve a clean, professional look. These methods ensure your pots look neat and last longer outdoors. Follow these steps to create smooth finishes and eye-catching designs.
Base Coating Tips
Start with a clean, dry pot. Remove dust and dirt for better paint hold. Apply a primer suitable for terracotta. This prevents paint from soaking into the pot. Use a wide brush or spray for even coverage. Let the primer dry completely before painting. Apply two thin coats of paint rather than one thick coat. Thin layers dry faster and reduce drips. Lightly sand between coats for smoothness. This creates a perfect base for your design.
Creating Patterns And Designs
Plan your design before you paint. Sketch it on paper or directly on the pot. Use a pencil for light, erasable lines. Simple shapes and repeated patterns work well. Paint small sections at a time for better control. Use fine brushes for detailed work and larger brushes for big areas. Layer colors carefully to avoid mixing. Let each color dry before adding another. This keeps lines sharp and colors bright.
Using Stencils And Tape
Stencils and tape help create clean, sharp edges. Choose stencils made of plastic or thick paper. Secure the stencil on the pot with painter’s tape. Use a sponge or small brush to dab paint gently over the stencil. Avoid brushing, which can cause paint to bleed. Remove the stencil carefully while the paint is still wet. Painter’s tape can mask off areas for straight lines. Press tape edges firmly to prevent paint seepage. This technique gives your pot a polished, professional look.
Adding Details And Embellishments
Adding details and embellishments can transform simple terracotta pots into beautiful art pieces. These small touches bring personality and charm to your pots. You can create patterns, textures, or shiny highlights to make your design stand out. This section covers easy ways to add these finishing touches like hand-painting, using metallic paints, and sealing your work.
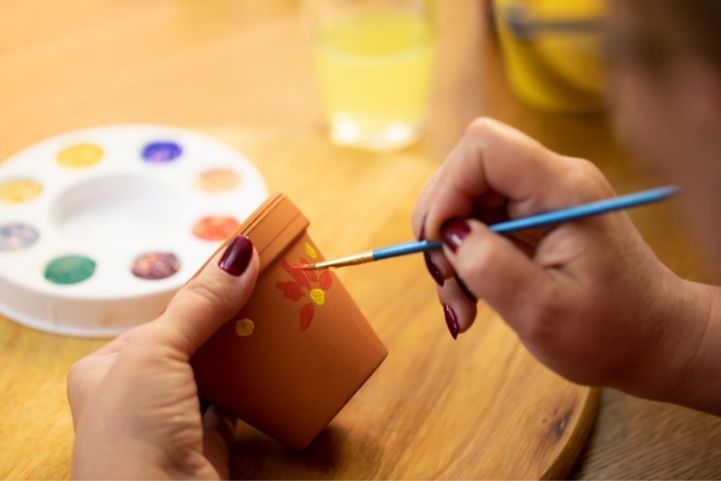
Hand-painting Fine Details
Use a small brush for delicate lines and shapes. Thin brushes help create patterns like dots, stripes, or flowers. Take your time and work slowly to keep details neat. Practice on paper before painting on the pot. Use acrylic paints for bright, lasting colors. Fine details make your pot look unique and special.
Incorporating Metallics And Textures
Metallic paints add shine and a rich feel to your pot. Gold, silver, or bronze can highlight edges or create bold accents. Use a sponge or palette knife to add texture. Raised paint or textured patterns make the pot interesting to touch. Try mixing metallics with regular paints for a layered look. Keep layers thin to avoid cracking.
Sealing Your Artwork
Seal your painted pot to protect your design from water and sun. Use a clear acrylic sealer spray or brush-on varnish. Apply two thin coats for the best protection. Allow each coat to dry completely before adding the next. Sealing keeps colors bright and prevents peeling. Your decorated pot will last longer outdoors or indoors.
Drying And Curing Painted Pots
Drying and curing painted terracotta pots is a crucial step. It ensures the paint sets well and lasts longer. Proper drying prevents smudges and peeling. Curing strengthens the paint, making your pots look professional.
Ideal Drying Conditions
Keep pots in a warm, dry place for best results. Avoid direct sunlight to prevent paint from cracking. Good air circulation helps the paint dry evenly. Temperatures between 65°F and 75°F work well. Let pots dry for at least 24 hours before handling.
Avoiding Common Mistakes
Do not rush the drying process by using heaters or hairdryers. This can cause bubbles or uneven texture. Avoid stacking pots before they are fully dry. Moisture trapped inside can ruin the paint finish. Handle pots gently until the paint is fully cured to avoid scratches.
Maintaining Painted Terracotta Pots
Maintaining painted terracotta pots keeps them looking fresh and colorful. Proper care helps your paint last longer. It also protects the pot’s surface from damage. Regular upkeep prevents peeling, cracking, and fading. With simple steps, your pots stay vibrant and strong.
Cleaning Without Damage
Use a soft cloth or brush for cleaning. Avoid harsh scrubbing that can scratch the paint. Mild soap mixed with water works best. Gently wipe the surface to remove dirt. Rinse with clean water and pat dry. Do not soak the pot in water. Excess moisture can harm both paint and clay.
Touch-up Tips For Longevity
Check your pots regularly for chips or cracks. Use matching paint to fix small spots. Lightly sand rough areas before repainting. Apply thin layers of paint to avoid clumps. Let each coat dry fully between applications. Seal the paint with a clear spray for extra protection. Store pots indoors during extreme weather for best results.
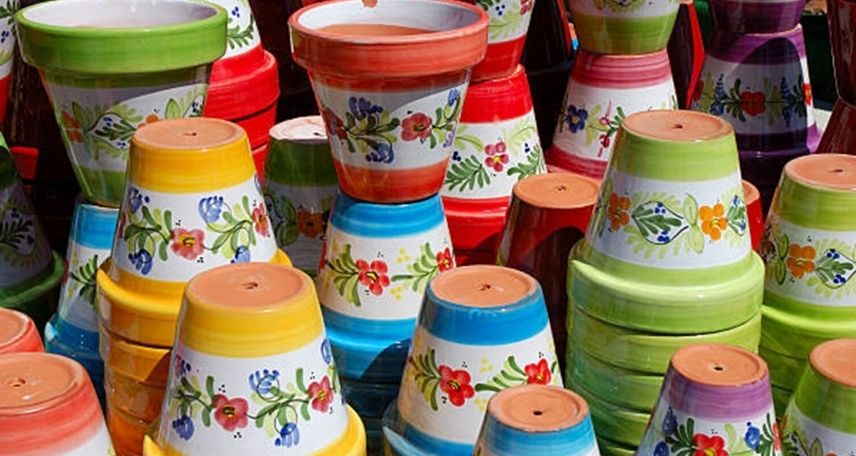
Creative Ideas For Inspired Designs
Painting terracotta pots opens up many creative paths. You can personalize each pot to fit your style or the season. This section shares fresh ideas to inspire your designs. Each style brings a unique charm to your garden or home.
Seasonal Themes
Seasonal themes bring color and joy to any space. Use bright yellows and oranges for fall pots. Add red and green for a festive holiday look. Soft pastels work well for spring and Easter. Summer calls for ocean blues and sunny shades. Change your pots with the seasons to keep your decor fresh.
Boho And Rustic Styles
Boho and rustic styles create a warm, earthy vibe. Use natural colors like browns, creams, and olive greens. Add patterns like stripes, dots, or tribal designs. Use a dry brush for a weathered, worn look. Wrap twine or jute around the pot for extra texture. These styles fit well in cozy, relaxed spaces.
Modern Minimalist Looks
Modern minimalist designs focus on clean lines and simple colors. Paint pots in solid shades like white, black, or gray. Use geometric shapes such as triangles or squares. Keep designs small and neat for a sleek look. Matte finishes add a contemporary touch. These pots suit modern homes and offices.
Frequently Asked Questions
How Do I Prepare Terracotta Pots For Painting?
Clean the pot thoroughly to remove dirt and dust. Lightly sand the surface to help the paint adhere better. Make sure the pot is completely dry before you start painting to avoid peeling.
What Type Of Paint Works Best On Terracotta Pots?
Acrylic paint is ideal for terracotta pots. It is water-based, dries quickly, and adheres well. Use outdoor or waterproof acrylic paint for durability, especially if the pot will be outside.
Should I Seal Terracotta Pots After Painting?
Yes, sealing your painted pot protects the design and paint from moisture. Use a clear acrylic sealer or varnish. This step extends the life of your artwork and keeps colors vibrant.
Can I Paint Terracotta Pots Without Priming?
While you can paint without priming, applying a primer is recommended. Primer improves paint adhesion and ensures an even finish. It also prevents the paint from soaking into the porous terracotta.
Conclusion
Painting terracotta pots can brighten any garden or home space. Choose the right paint and prepare the pot well. Take your time to apply even coats for a smooth finish. Let each layer dry completely before the next. Add your personal touch with designs or patterns.
This simple process makes old pots look fresh and new. Enjoy the fun and creativity that painting brings. Your pots will stand out and last longer too. Try it today and see the difference yourself!