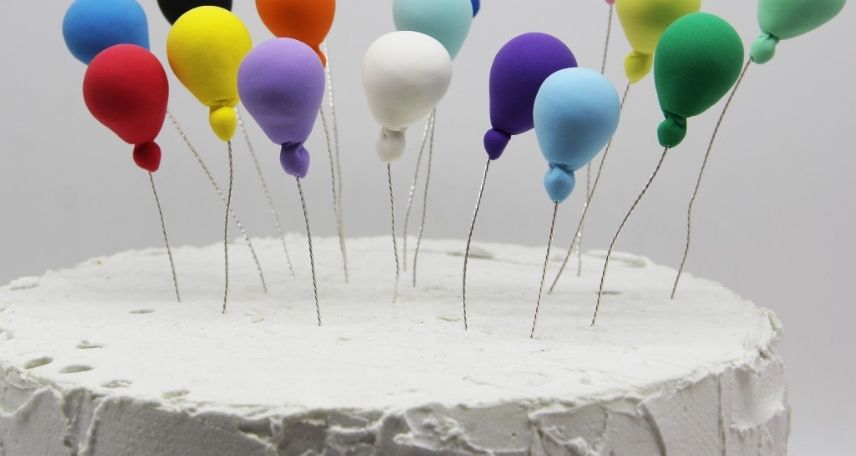
Looking to add a fun and eye-catching touch to your next cake? A balloon cake topper is the perfect way to make your dessert stand out.
Imagine the joy on your guests’ faces when they see a colorful, festive decoration right on top of your cake. You don’t need fancy tools or expensive materials to create one. You’ll discover simple steps to make your own balloon cake topper that looks professional and adds a burst of celebration to any occasion.
Ready to impress everyone with your creativity? Let’s get started!
Materials Needed
Creating a balloon cake topper needs the right materials. Choosing the correct items makes your project easier. It also helps the topper look great and last longer. This section covers the essential materials to gather before starting.
Types Of Balloons
Select balloons that fit your cake topper design. Latex balloons are common and affordable. They come in many colors and sizes. Foil balloons offer a shiny finish and stay inflated longer. Use small balloons for detailed shapes. Large balloons work well for bold designs.
Additional Supplies
Besides balloons, gather extra supplies for assembly. Balloon sticks or straws hold the balloons upright. Balloon tape or glue dots secure balloons together. Ribbon or string adds decoration and holds parts in place. Scissors help cut ribbons and tape. A hand pump speeds up balloon inflation.
Choosing The Right Tools
Good tools make your work smooth and neat. Use a balloon pump to avoid sore lips and save time. Sharp scissors ensure clean cuts on ribbons and tape. Needle or balloon pin helps release air if needed. Tweezers can place small glue dots accurately. Have a flat surface for easier assembly.
Preparing Your Workspace
Preparing your workspace is the first step to making a balloon cake topper. It helps keep your tools and materials ready. A clean and organized space makes the process smooth and fun. It also helps you avoid mistakes and accidents.
Cleaning And Organizing
Clear the table or desk where you will work. Remove any dust or crumbs. Use a damp cloth to wipe the surface clean. Arrange all your tools like scissors, glue, and balloons within reach. Keep your balloons in a bowl or box to prevent them from rolling away. Organize your materials to save time and avoid frustration.
Safety Tips
Work in a space away from sharp edges or fragile items. Keep scissors and pins out of children’s reach. Use glue carefully to avoid skin contact. Blow balloons gently to prevent them from popping loudly. Dispose of popped balloon pieces immediately to avoid choking hazards. Wear protective eyewear if you feel it is needed.
Setting Up Lighting
Good lighting is important to see details clearly. Use natural light if possible. Position your workspace near a window during daytime. If natural light is not enough, use a desk lamp. Make sure the light shines directly on your work area. Avoid shadows that can hide small parts. Bright lighting helps create precise and neat designs.
Inflating Balloons
Inflating balloons is a key step in making a balloon cake topper. The right inflation helps the balloons look neat and last longer. Overinflated balloons can pop easily. Underinflated ones may look droopy and weak. Controlling the size and shape is important for a balanced design.
Using the correct tools and methods makes inflating easier. Consistent balloon sizes help the topper look tidy and professional. Avoiding common mistakes saves time and prevents frustration. Follow simple tips for the best results.
Best Inflation Methods
Use a balloon pump for fast and easy inflation. Hand pumps work well for small balloons. Electric pumps speed up the process for many balloons. Mouth inflation is possible but tiring and less precise. Always choose a pump that fits your balloon neck.
Achieving Consistent Sizes
Mark the balloon at the desired size before inflating. Use a ruler or tape measure for accuracy. Inflate slowly to the mark and stop. Check each balloon against the first one. Consistent sizes create a neat and balanced topper.
Avoiding Common Mistakes
Do not overinflate balloons to prevent popping. Avoid underinflating to keep the shape firm. Tie knots tightly to stop air leaks. Handle balloons gently to avoid tears. Store inflated balloons away from sharp objects and heat.
Shaping The Topper
Shaping the balloon cake topper is a fun and creative step. It gives your cake a unique look. This step needs some basic skills and patience. You will learn simple ways to twist balloons and make different shapes. The goal is to create a topper that stands out and fits your cake’s theme.
Start with easy shapes and build your confidence. Use balloons that are the right size and type for your design. The right tools help, like a hand pump and good quality balloons. Practice each technique slowly to avoid popping balloons.
Basic Balloon Twisting Techniques
Start by inflating the balloon but leave some space at the end. This space helps prevent popping when twisting. Hold the balloon firmly and make small twists. Each twist forms a segment of the shape. Lock each twist by twisting segments together. Practice making basic shapes like loops and bubbles. These simple twists are the base of all designs.
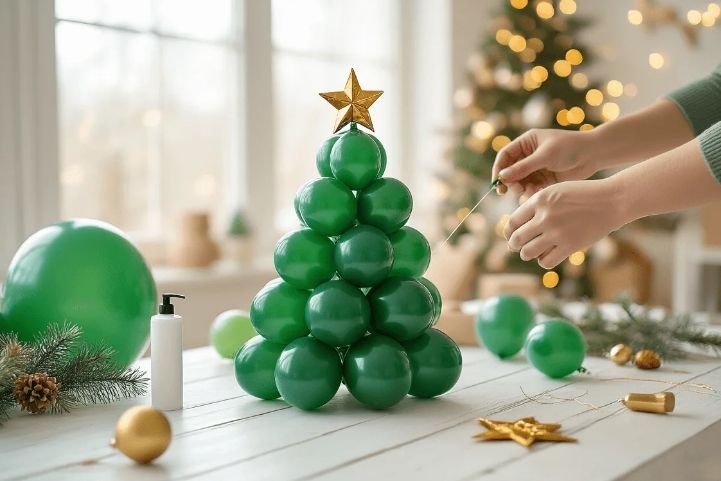
Creating Balloon Clusters
Clusters add volume and style to your topper. Make several small balloons of equal size. Twist them together at their ends to form a bunch. Use clusters to create flowers, stars, or abstract shapes. Clusters make your topper look fuller and colorful. They are easy to arrange and secure on the cake.
Designing Custom Shapes
Custom shapes give your topper a personal touch. Combine basic twists and clusters to form animals, letters, or symbols. Use different balloon colors to enhance the design. Study simple shapes first, then try complex ones. Take your time to perfect each shape. Custom designs make your cake topper truly special.
Assembling The Topper
Assembling the balloon cake topper is a fun and creative part of the process. This step brings all the balloon pieces together to form a beautiful design. Follow simple methods to arrange, secure, and support the balloons for a sturdy topper.
Arranging Balloon Pieces
Start by laying out all balloon pieces on a flat surface. Group similar sizes and colors to create a balanced look. Place larger balloons in the center or bottom for stability. Smaller balloons fill gaps and add detail. Arrange them closely to avoid empty spaces.
Securing With Tape And Glue
Use clear tape to hold balloons in place gently. Wrap tape around balloon knots or stems for a firm grip. Avoid using too much tape to keep the topper light. Apply a small amount of glue for extra hold, especially on paper or plastic parts. Let glue dry before moving to the next step.
Adding Support Structures
Support helps the topper stay upright on the cake. Use thin sticks or skewers to anchor balloons. Insert them carefully through balloon clusters. Tape or tie sticks together for extra strength. Make sure support pieces do not poke out of the cake. This keeps the topper safe and neat.
Decorating Tips
Decorating a balloon cake topper can make your celebration extra special. Small touches can create a big impact. This section shares easy decorating tips. These tips help you make your balloon cake topper beautiful and unique.
Incorporating Colors And Patterns
Choose colors that match the party theme. Use bright or soft shades depending on the event. Mix solid colors with patterns to add interest. Polka dots, stripes, or stars work well. Balance colors so they do not clash. Use color combinations that feel fresh and fun.
Adding Ribbons And Accessories
Ribbons add charm and texture to balloon toppers. Tie small bows around balloon strings for a cute look. Use thin or wide ribbons based on your style. Add tiny charms, beads, or stickers for extra flair. Keep accessories light to avoid popping balloons. These details make your topper more festive and eye-catching.
Personalizing For Occasions
Customize your balloon cake topper for every event. For birthdays, add numbers or names on balloons. Use themed stickers or small toys for holidays. For weddings, soft colors and delicate ribbons work well. Personal touches make the topper meaningful and memorable. Tailor decorations to fit the mood of the celebration.
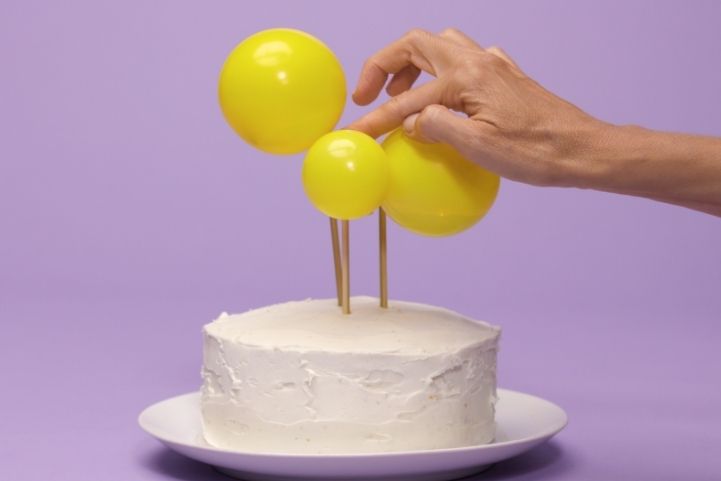
Attaching To The Cake
Attaching a balloon cake topper to your cake is an important step. It helps the decoration stay in place. The attachment needs to be safe and steady. You want the topper to look perfect without damaging the cake. Small mistakes can make the topper fall or ruin the cake’s surface. This section covers how to attach the balloon topper properly and safely.
Safe Attachment Methods
Use food-safe materials to attach the balloon topper. Wooden skewers or plastic sticks work well. Avoid sharp objects that can hurt someone. Insert sticks gently into the cake. Secure the balloon strings to the sticks with tape or string. Do not use glue or tape directly on the cake. Make sure no part of the attachment touches the edible parts.
Ensuring Stability
Place the sticks deep enough to hold the topper steady. Spread the sticks evenly under the balloon structure. Check if the topper moves or wobbles. Add more sticks if needed. Keep the balloon topper light to reduce pressure on the cake. A stable topper prevents accidents during the celebration.
Removing After Use
Remove the balloon topper carefully after the event. Pull out the sticks slowly to avoid cake damage. Dispose of any non-edible parts properly. If the cake surface sticks to the topper, use a knife or spatula to separate gently. Clean the cake edges if needed. This keeps the cake looking fresh for serving.
Troubleshooting
Troubleshooting is an important part of making a balloon cake topper. Problems can happen at any step. Knowing how to fix common issues saves time and stress. This guide helps solve typical balloon problems fast.
Fixing Deflated Balloons
Deflated balloons lose their shape and look bad. First, check for small holes or tears. Use clear tape to cover tiny holes carefully. If the balloon is too flat, add more air slowly. Avoid overinflating to stop popping. Replace balloons that cannot hold air well.
Repairing Shape Issues
Balloon shapes can twist or look uneven. Gently reshape balloons by hand to smooth curves. Adjust the position on the cake for balance. Use balloon clips or string to hold shapes steady. If a balloon is misshapen, try swapping it with a new one.
Handling Unexpected Problems
Unexpected problems can happen anytime. Stay calm and check the problem clearly. Prepare extra balloons and tools before starting. Use scissors and tape for quick fixes. Ask a friend for help if needed. Keep extra time for repairs to avoid rushing.
Tips For Longevity
Keeping your balloon cake topper fresh and beautiful is key to making your celebration special. Balloon toppers can lose their shape or shine quickly. Taking the right steps helps them last longer and look great throughout the event.
Storage Before Use
Store the balloon topper in a cool, dry place away from sunlight. Avoid hot or humid areas that can cause balloons to pop or deflate. Keep it in a sealed bag or box to protect it from dust and dirt. Do not place heavy items on top, as this can damage the shape.
Maintaining Freshness
Check the balloons regularly for any signs of deflation. Use a balloon pump to add a little air if needed. Avoid touching the balloons too much, as oils from hands can weaken them. Keep the topper away from sharp objects and pets to prevent accidental popping.
Transporting The Topper
Use a sturdy box or container to carry the balloon topper safely. Place soft padding around it to avoid bumps and pressure. Keep the topper upright during transport. Drive carefully to prevent sudden stops or sharp turns that can damage the balloons.
Frequently Asked Questions
What Materials Do I Need For A Balloon Cake Topper?
You need balloons, balloon pump, fishing line or string, and glue dots. Optional items include scissors and decorative ribbons. These materials help create a stable, attractive balloon cake topper.
How Do I Choose The Right Balloon Size For Cake Toppers?
Select small to medium balloons, around 5 to 10 inches. This size is perfect for balance and decoration without overwhelming the cake.
Can I Reuse Balloon Cake Toppers For Other Events?
Yes, if balloons stay intact and clean, you can reuse them. Store carefully in a cool, dry place to maintain their shape and color.
How Long Does It Take To Make A Balloon Cake Topper?
It usually takes 20 to 30 minutes, depending on complexity. Simple designs are quicker, while intricate ones require more time and patience.
Conclusion
Creating a balloon cake topper is fun and simple. Use the steps to make your own unique design. Choose colors and shapes that match your party theme. This topper will add charm and joy to any cake. Enjoy crafting and impress your friends with your creativity.
Celebrate with a special touch that you made yourself. Keep practicing to improve your skills over time. A homemade balloon topper makes every cake more festive and bright. Give it a try and have fun!