Are you ready to transform everyday objects into stunning works of art? Decoupage paper is your secret weapon to add color, texture, and personality to almost anything.
Whether you’re a beginner or looking to sharpen your skills, this comprehensive guide will walk you through everything you need to know. From choosing the right paper to mastering simple techniques, you’ll discover how easy and fun it is to bring your creative ideas to life.
Keep reading, and unlock the full potential of decoupage paper for your next project!
Types Of Decoupage Paper
Decoupage paper comes in many types. Each type offers unique textures and styles. Choosing the right paper can enhance your craft project. Explore these common types to find what suits your needs best.
Tissue Paper
Tissue paper is thin and delicate. It is easy to tear and shape. Its translucency creates soft, layered effects. Ideal for light, airy designs and backgrounds.
Napkins
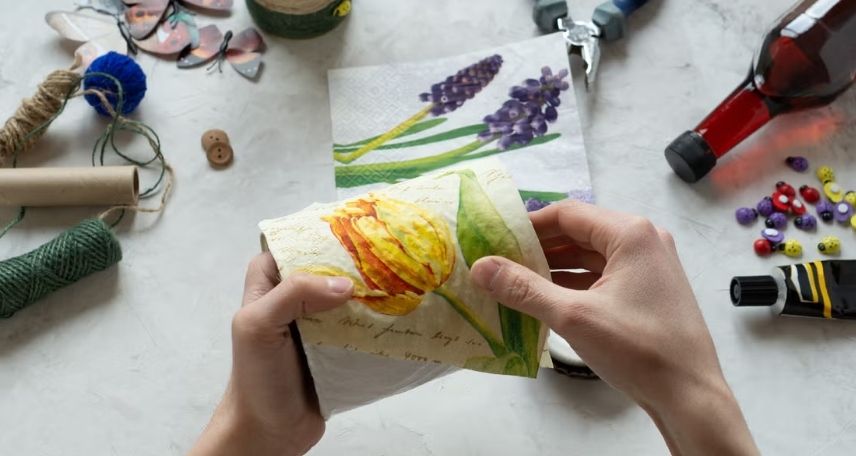
Napkins are popular for decoupage. They often have colorful prints and patterns. Use only the top printed layer for best results. Napkins add a decorative, vintage look to items.
Rice Paper
Rice paper is thin but strong. It is slightly textured and smooth. It absorbs glue well without tearing. Perfect for detailed and intricate designs.
Wrapping Paper
Wrapping paper comes in many colors and patterns. It is thicker than tissue or napkins. Cut and fold easily for varied effects. Great for bold and vibrant projects.
Scrapbook Paper
Scrapbook paper is sturdy and decorative. It often features printed patterns and textures. It holds up well to glue and paint. Best for structured and layered designs.
Choosing The Right Paper

Choosing the right decoupage paper is key to a successful craft project. The paper affects the final look and how easy it is to work with. Different projects need different types of paper. Consider texture, thickness, design, and color carefully. These factors help you pick paper that fits your style and project needs.
Texture And Thickness
Texture influences how the paper feels and looks. Smooth paper works best for flat surfaces. Rough or handmade paper adds character to simple shapes. Thickness affects how the paper handles glue and paint. Thin paper is easy to bend and layer. Thick paper is stronger but harder to smooth out. Choose thickness based on your project’s surface.
Design And Patterns
Patterns set the mood of your project. Small patterns suit small or detailed items. Large patterns stand out on bigger surfaces. Choose designs that match your theme or room style. Floral, geometric, or abstract—pick what fits your vision. Avoid busy patterns if you want a clean, simple look.
Color Considerations
Color affects the overall feel of your piece. Bright colors catch the eye and create energy. Soft, pastel tones bring calm and elegance. Consider the colors of the base you will cover. Transparent papers show the background color through. Use color to complement or contrast with your project.
Durability Factors
Durability matters for long-lasting projects. Some papers resist tearing better than others. Choose acid-free paper to prevent yellowing over time. Glossy papers resist water and stains. Matte papers are easier to paint on. Think about how much wear your project will face. Pick paper that holds up well in that setting.
Essential Tools And Materials
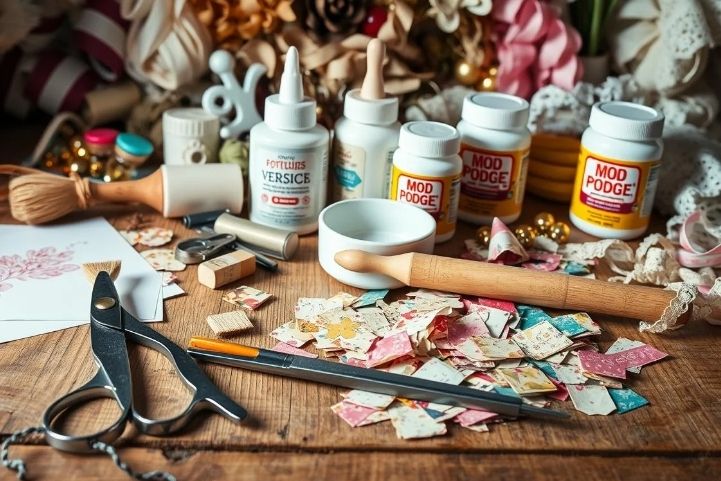
Decoupage paper projects need specific tools and materials. These help you get clean cuts, strong bonds, and smooth finishes. Using the right supplies makes the process easier and the results better.
Adhesives And Glues
Choose adhesives that dry clear and stick well. White glue and decoupage glue are common picks. Some crafters prefer glue sticks for small pieces. Avoid thick glues that cause lumps or wrinkles.
Cutting Tools
Sharp scissors work well for simple shapes and edges. Craft knives offer precision for detailed cuts. Use a cutting mat to protect surfaces. Always keep blades sharp to avoid tearing paper.
Sealants And Finishes
Sealants protect your project and give a nice shine. Water-based varnishes dry fast and are easy to clean. Matte or glossy finishes change the final look. Apply thin layers for smooth results.
Brushes And Applicators
Soft brushes help spread glue evenly without damaging paper. Foam brushes avoid streaks and hold glue well. Use small brushes for tight spots and edges. Clean brushes after use to keep them in good shape.
Basic Decoupage Techniques
Basic decoupage techniques form the foundation of this creative art. They help you transform plain objects into beautiful pieces using paper and glue. Each step is simple but important for a neat and lasting design.
Understanding these techniques ensures your project looks professional and stays intact over time. The following sections explain key steps for beginners and hobbyists alike.
Cutting And Arranging
Start by cutting the decoupage paper carefully. Use sharp scissors or a craft knife for clean edges. Cut out shapes or patterns that fit your project well.
Arrange the pieces on your surface before gluing. Move them around to find the best layout. This step helps avoid mistakes and makes your design balanced.
Layering Paper
Layering adds depth and interest to your decoupage. Place smaller pieces over larger ones to create a 3D effect. Be gentle to avoid tearing the paper.
Use thin paper for easier layering. Thicker paper may cause bumps and uneven surfaces. Smooth layers give a polished look.
Smoothing And Adhesion
Apply glue evenly to stick the paper down securely. Use a brush or sponge for smooth coverage. Press the paper gently to remove air bubbles.
Work from the center outward to push out wrinkles. Take care not to tear the paper during this step. Strong adhesion prevents peeling later.
Sealing Your Design
Seal your finished design to protect it from damage. Use a clear decoupage sealer or varnish. This step adds shine and makes the surface water-resistant.
Apply thin coats and let each dry before the next. Proper sealing ensures your artwork lasts longer and stays beautiful.
Creative Project Ideas
Decoupage paper offers endless creative possibilities. It can transform ordinary items into eye-catching pieces. This section shares ideas to inspire your next project. Simple materials combined with decoupage paper can create beautiful results. Try these ideas to add a personal touch to your space and gifts.
Decorating Furniture
Use decoupage paper to refresh old furniture. Cover tabletops with floral or geometric patterns. Apply paper to drawers for a custom look. Protect your work with a clear sealant. Even small pieces like stools and shelves can shine. This method costs less than buying new furniture. It breathes new life into worn-out items.
Customizing Home Decor
Brighten your home with decoupage paper crafts. Decorate picture frames with colorful designs. Add patterns to lampshades for a unique glow. Create wall art by layering paper on canvases. Use paper to cover flower pots or vases. These small touches make your home feel special. You can match colors to your room’s style.
Personalized Gifts
Make gifts more meaningful with decoupage paper. Decorate jewelry boxes with favorite colors or themes. Customize notebooks with inspiring images. Create photo albums with paper borders and accents. Personal touches show care and effort. Handmade gifts stand out and feel heartfelt. Anyone can enjoy these thoughtful creations.
Seasonal And Holiday Crafts
Celebrate seasons with decoupage paper projects. Decorate pumpkins or Easter eggs with festive patterns. Make holiday cards with paper cutouts and designs. Create ornaments for Christmas trees using layered paper. Use themed paper to make table centerpieces. These crafts add warmth and cheer to any event. They bring fun and creativity to celebrations.
Troubleshooting Common Issues
Decoupage paper projects can face a few common problems. These issues may cause frustration but are easy to fix. Knowing how to handle them saves time and improves results. This section helps solve typical decoupage paper troubles. Follow these simple tips for a smooth crafting experience.
Avoiding Wrinkles And Bubbles
Wrinkles and bubbles often appear during glue application. Use thin layers of glue to keep the paper flat. Smooth the paper gently with a soft brush or a plastic card. Work from the center outward to push air out. Let each layer dry before adding more glue. This approach helps keep the surface smooth and wrinkle-free.
Fixing Tears And Rips
Tears can happen while handling delicate decoupage paper. Small rips can be fixed by applying a thin glue layer under the tear. Press the torn edges down gently with a brush. For bigger tears, use a small piece of matching paper behind the rip. Glue it carefully to hold the paper together. Let the patch dry fully before continuing your project.
Preventing Color Bleeding
Color bleeding ruins the clean look of decoupage art. To stop this, avoid using too much water or glue. Choose water-based glue for the best results. Seal the paper with a clear, water-based sealer after drying. Test the paper with your glue on a scrap piece first. This ensures no colors bleed or run during the project.
Maintaining Longevity
Proper care keeps your decoupage art looking fresh for years. Use a clear varnish or sealer to protect the surface. Avoid placing the piece in direct sunlight or damp areas. Clean the surface gently with a dry cloth to remove dust. Store your artwork in a cool, dry place to prevent damage over time.
Advanced Techniques
Advanced decoupage techniques bring new life to simple paper crafts. These methods add texture, depth, and sparkle. They help you create unique, eye-catching projects. Each technique offers a chance to explore creativity and experiment with materials.
3d Decoupage Effects
3D decoupage uses layers of paper to create depth. Cut out the same image multiple times. Stack the pieces using foam pads or silicone glue. This technique makes your designs stand out from the background. It adds a realistic, pop-up effect that looks impressive.
Mixed Media Combinations
Combine decoupage paper with paints, inks, or stamps. This mix creates rich textures and vibrant colors. Use acrylic paint to add backgrounds or highlights. Stamps can add patterns and details. This method makes your craft more dynamic and interesting.
Aging And Distressing
Aging paper gives your projects a vintage feel. Lightly sand edges to create a worn look. Use tea or coffee stains to darken paper. Ink pads can add old, faded tones. These steps bring character and history to your work.
Using Metallic And Glitter Papers
Metallic and glitter papers add shine and glamour. Use them for accents or full backgrounds. Cut carefully to avoid tearing. Seal with a clear varnish to protect the sparkle. These papers catch light and add a festive touch.
Where To Buy Quality Decoupage Paper
Finding quality decoupage paper is key for your crafting projects. The right paper makes your work look better and last longer. Many places sell decoupage paper, each with its own benefits. This guide helps you find the best spots to buy quality paper.
Local Craft Stores
Local craft stores offer a hands-on shopping experience. You can see the paper texture and colors directly. Staff often help with advice and project tips. These stores usually carry popular brands and seasonal designs. Shopping local supports your community and saves shipping time.
Online Retailers
Online retailers provide a wide range of decoupage paper styles. You find unique patterns and large quantities with ease. Customer reviews help pick the best products. Many online shops offer fast delivery and discounts. This option suits those who prefer shopping from home.
Specialty Paper Shops
Specialty paper shops focus on high-quality and rare papers. They offer unique textures and artistic prints. These shops cater to serious crafters and artists. Prices might be higher but the quality often justifies the cost. Specialty shops may also provide expert advice and custom orders.
Budget-friendly Options
Budget-friendly decoupage paper is available at discount stores and dollar shops. These papers work well for beginners and practice projects. You can find multi-packs that lower the price per sheet. While quality varies, many affordable papers still look good. Great for those who want to craft without spending much.
Caring For Decoupage Creations
Caring for decoupage creations helps them last longer and look great. These crafts need gentle care to keep their colors bright. Protecting your artwork from dust, moisture, and damage is key. Simple steps can keep your decoupage fresh and beautiful for years.
Cleaning Tips
Dust your decoupage items gently with a soft cloth. Avoid using water or harsh cleaners. A dry microfiber cloth works best to remove dirt. For stubborn spots, use a slightly damp cloth and dry immediately. Do not scrub or use abrasive materials. Keep your artwork away from direct sunlight to prevent fading.
Storage Solutions
Store decoupage pieces in a cool, dry place. Use acid-free tissue paper to wrap delicate items. Avoid stacking heavy objects on top of your work. Keep items away from heat sources and humidity. Use sealed containers to protect from dust and pests. Proper storage helps maintain the paper’s color and glue strength.
Repair And Restoration
Fix small tears with clear craft glue applied carefully. Use a soft brush to spread glue evenly. For faded colors, consider light touch-ups with matching paints. Replace damaged paper pieces by carefully cutting and gluing new ones. Always test repair materials on a hidden area first. Gentle repairs extend the life of your decoupage art.
Frequently Asked Questions
What Is Decoupage Paper Used For?
Decoupage paper is used to decorate surfaces by gluing cut-out images onto objects. It adds artistic flair to furniture, crafts, and home décor.
How Do I Choose The Right Decoupage Paper?
Choose decoupage paper based on texture, thickness, and design. Thin rice paper works well for delicate projects, while thicker paper suits sturdy items.
Can I Use Regular Paper For Decoupage?
Regular paper can be used, but it may wrinkle or tear easily. Specialized decoupage paper offers better durability and smoother application.
How Do I Apply Decoupage Paper Smoothly?
Use a decoupage glue or Mod Podge and smooth out wrinkles with a brush or sponge. Work from the center outward for best results.
Conclusion
Decoupage paper adds a special touch to many projects. It is easy to use and comes in many styles. You can decorate furniture, boxes, and cards with it. Choosing the right paper makes a big difference. Practice helps you get better and more creative.
Enjoy crafting and bring your ideas to life. Keep exploring new designs and techniques. Decoupage paper opens many fun possibilities. Try it today and see what you create!